12 Creative Ideas for a Fun Craft Night With Friends: Unleash Creativity
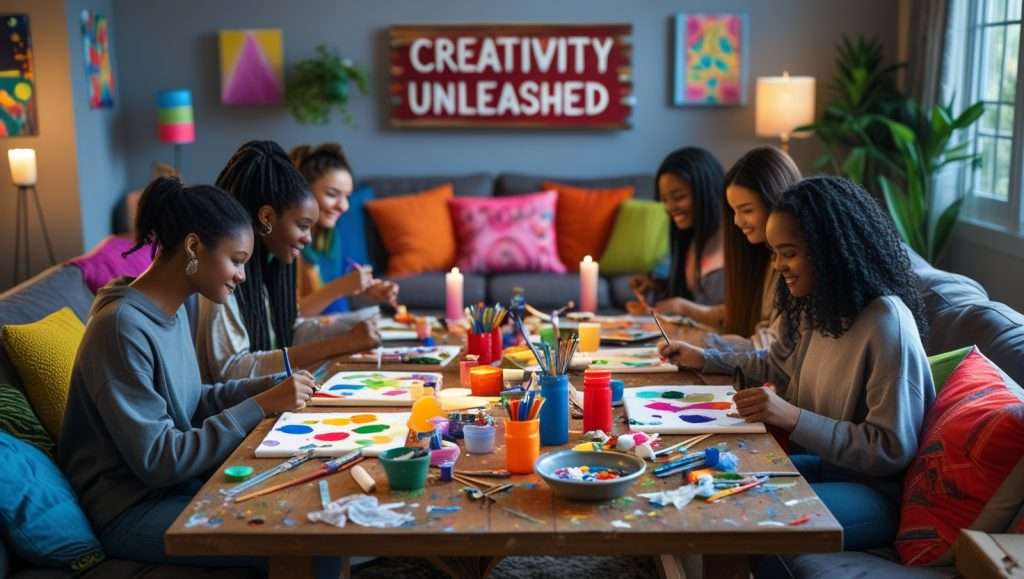
Craft nights with friends are a wonderful way to bond and unwind. They offer a chance to get creative together, share laughs, and make lasting memories. Imagine an evening filled with laughter, creativity, and the joy of making something with your own hands. That’s what a fun craft night with friends promises. It’s more than just an activity; it’s a chance to connect on a deeper level.
Whether you’re a seasoned crafter or a beginner, there’s something magical about working on projects together. From painting to DIY home decor, the possibilities are endless. Craft nights can turn any ordinary evening into a memorable event. Ready to explore some creative ideas? Let’s dive into how you can make your next gathering a hit with these fun and crafty projects.
Craft Night Essentials
A Friends Craft Night can be an exciting way to spend time together. Whether you are planning a casual evening or a themed craft night, having the right essentials can make your event unforgettable. Here, we cover the Craft Night Essentials to ensure your gathering is a success.
Supplies To Gather
Gathering the right crafting supplies is crucial for a successful craft night. Depending on your chosen diy projects or craft night ideas, the supplies will vary. Here are some must-have items:
- Scissors: A good pair of scissors is essential for most projects.
- Glue: Both glue sticks and liquid glue can be useful.
- Paints and Brushes: If you plan on painting, have a variety of colors and brush sizes.
- Paper: Different types of paper for various projects, such as construction paper, cardstock, and patterned paper.
- Markers and Pens: Fine-tip markers and pens for detailed work.
- Crafting Tools: Items like hole punchers, rulers, and craft knives.
- Embellishments: Things like stickers, beads, ribbons, and sequins.
Here’s a table to help you organize your supplies:
| Category | Items |
|---|---|
| Cutting | Scissors, Craft Knives |
| Adhesives | Glue Sticks, Liquid Glue |
| Painting | Paints, Brushes |
| Paper | Construction Paper, Cardstock |
| Drawing | Markers, Pens |
| Embellishments | Stickers, Beads, Ribbons |
These supplies will cover most creative activities and fun group activities for your friends’ craft night. Having a well-stocked supply kit ensures everyone can participate and enjoy the night.
Setting The Mood
Creating the right atmosphere is just as important as having the right supplies. A good mood can make your social crafting event more enjoyable. Here are some tips to help you set the mood:
- Lighting: Soft, warm lighting creates a cozy environment. Use string lights or lamps instead of harsh overhead lights.
- Music: Play some background music to keep the energy up. Choose a playlist that everyone enjoys.
- Comfort: Ensure seating is comfortable. Have enough chairs and cushions for everyone.
- Snacks and Drinks: Offer a variety of snacks and beverages. Consider having a mix of healthy and indulgent options.
- Decorations: Add some simple decorations related to your themed craft night. This can include banners, tablecloths, and centerpieces.
Here’s an example of how you can set up your crafting area:
| Aspect | Details |
|---|---|
| Lighting | String lights, Lamps |
| Music | Background Playlist |
| Comfort | Chairs, Cushions |
| Snacks | Healthy and Indulgent Options |
| Decorations | Themed Banners, Tablecloths |
By focusing on these aspects, you can create a welcoming and enjoyable environment for your craft party ideas. This attention to detail will enhance the overall experience for everyone involved in your arts and crafts night.
Diy Home Decor
Gathering with friends for a fun craft night can be a delightful way to bond and create beautiful things together. One exciting theme for your craft night is DIY home decor. Making your own home decor items can add a personal touch to your living space and give you a sense of accomplishment. Here are some creative ideas to get you started.
Personalized Wall Art
Creating personalized wall art is a fantastic way to express your creativity and make a statement in your home. You can use various materials like canvas, wood, or even old picture frames. Here are some ideas to inspire you:
- Canvas Painting: Use acrylic paints to create abstract designs or simple landscapes. You can also use stencils for more intricate patterns.
- String Art: Hammer nails into a wooden board in a specific pattern and use colorful strings to connect the nails, forming shapes or words.
- Photo Collage: Print your favorite photos and arrange them on a canvas or a large piece of paper. Add some decorative elements like stickers or washi tape.
- Quote Boards: Paint a piece of wood or canvas with a solid color and use stencils or freehand to write your favorite quotes. Add some embellishments like glitter or small flowers.
Here is a simple table to help you choose the right materials for your wall art:
| Type of Wall Art | Materials Needed |
|---|---|
| Canvas Painting | Canvas, acrylic paints, brushes |
| String Art | Wooden board, nails, string, hammer |
| Photo Collage | Photos, canvas/paper, glue, stickers |
| Quote Boards | Wood/canvas, paint, stencils, embellishments |
Personalized wall art not only beautifies your home but also serves as a conversation starter. It reflects your personality and creativity.
Decorative Mason Jars
Decorative mason jars are another fun and easy DIY project. These jars can be used for various purposes, from storage to decorative lighting. Here are some creative ways to decorate mason jars:
- Painted Jars: Use acrylic or chalk paints to give your jars a new look. You can paint them in solid colors or create patterns like stripes or polka dots.
- Glitter Jars: Apply a layer of glue to the outside of the jar and roll it in glitter. Once dry, seal it with a clear spray sealer.
- Decoupage Jars: Cut out pieces of decorative paper or fabric and use decoupage glue to adhere them to the jar. Cover the entire jar for a unique design.
- Light-Up Jars: Place a string of fairy lights inside the jar for a magical glow. You can also paint the jar with translucent glass paint for a colored light effect.
Here are some materials you might need for decorative mason jars:
| Type of Decoration | Materials Needed |
|---|---|
| Painted Jars | Mason jars, acrylic/chalk paints, brushes |
| Glitter Jars | Mason jars, glue, glitter, clear sealer |
| Decoupage Jars | Mason jars, decorative paper/fabric, decoupage glue, brush |
| Light-Up Jars | Mason jars, fairy lights, translucent glass paint (optional) |
Decorative mason jars can brighten up any space and serve as charming gifts for loved ones. They are versatile and can be customized to fit any style or occasion.
Fun With Fabrics
Hosting a craft night with friends is a fantastic way to unleash creativity and bond. One of the most enjoyable activities you can include is Fun with Fabrics. Fabric crafts are versatile, colorful, and suitable for all skill levels. Let’s dive into two exciting fabric-based projects: Tie-Dye T-Shirts and Fabric Scrap Bookmarks.
Tie-dye T-shirts
Creating tie-dye t-shirts is a classic and fun fabric craft. It’s perfect for a craft night as it allows everyone to showcase their unique style. Here’s how you can get started:
- Gather Supplies: You’ll need white cotton t-shirts, rubber bands, plastic squeeze bottles, and fabric dye in various colors.
- Prep the Area: Cover your workspace with plastic or old newspapers to avoid stains. Have gloves on hand to protect your skin.
- Twist and Bind: Twist the t-shirts in different patterns and secure them with rubber bands. The tighter the bands, the more defined the pattern.
- Apply Dye: Mix the fabric dye according to the instructions. Use the squeeze bottles to apply dye to the shirts. Be creative with your color choices!
- Let It Set: Place the dyed shirts in plastic bags and let them sit for 6-8 hours. This allows the dye to fully saturate the fabric.
- Rinse and Wash: Rinse the shirts under cold water until the water runs clear. Wash them separately in cold water and dry them.
Here are some popular tie-dye techniques:
| Technique | Description |
|---|---|
| Spiral | Twist the shirt from the center and apply dye in a circular pattern. |
| Stripes | Fold the shirt in accordion pleats and apply dye in stripes. |
| Sunburst | Pinch sections of the shirt and apply dye in bursts. |
This project not only results in a wearable piece of art but also provides a memorable experience for everyone.
Fabric Scrap Bookmarks
Fabric scrap bookmarks are a delightful and eco-friendly craft idea. They are easy to make and perfect for using up leftover fabric. Follow these steps to create beautiful bookmarks:
- Collect Scraps: Gather fabric scraps in different colors and patterns. You can use pieces from old clothes or leftover craft projects.
- Cut Fabric: Cut the fabric scraps into rectangular shapes. Aim for sizes around 2 inches by 6 inches.
- Add Backing: Cut pieces of felt or sturdy fabric to use as backing. The backing should be slightly larger than the fabric scraps.
- Decorate: Use fabric glue to attach the scraps to the backing. Arrange them in a collage style or create patterns.
- Personalize: Add embellishments like buttons, ribbons, or beads. You can also use fabric markers to write messages or draw designs.
- Finish: Let the glue dry completely. Trim any excess backing material for a neat finish.
Tips for creating unique bookmarks:
- Mix Textures: Combine different fabric textures like cotton, silk, and denim.
- Color Coordination: Choose scraps that complement each other in color and pattern.
- Layering: Layer multiple scraps for a more intricate design.
Fabric scrap bookmarks make wonderful gifts and are a great way to upcycle old materials. This craft is simple yet allows for endless creativity.
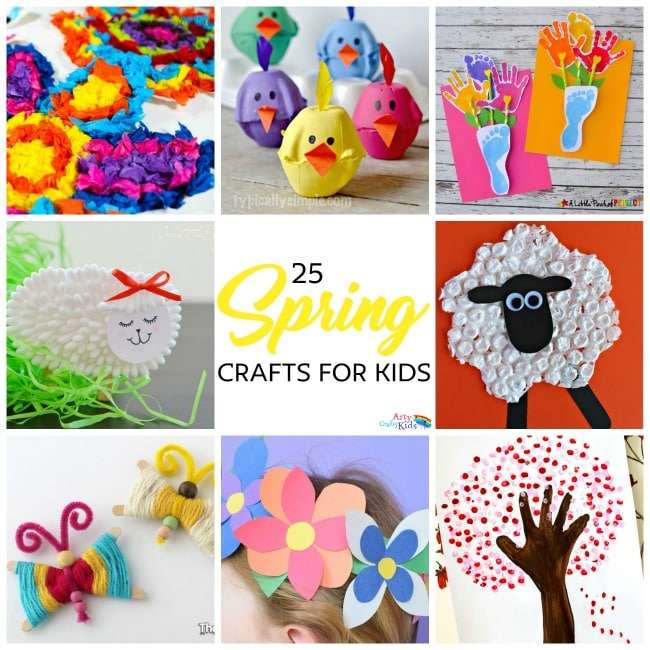
Creative Painting Ideas
Having a craft night with friends can be an exciting way to spend time together. Among various creative ideas, painting stands out as an enjoyable and artistic activity. Creative painting ideas are perfect for bringing color and fun to your night. Let’s dive into some specific painting activities that you and your friends can try.
Canvas Painting Party
A canvas painting party is a fantastic way to unleash your artistic side. You don’t need to be a professional artist to enjoy this activity. Here are some tips to make your canvas painting party a success:
- Supplies: Gather canvases, acrylic paints, brushes, and palettes. You can find affordable supplies at local craft stores or online.
- Theme: Choose a theme for your painting party. It could be anything from landscapes to abstract art. This makes it easier to decide what to paint.
- Inspiration: Look for inspiration online. Websites like Pinterest have endless ideas and tutorials.
- Music: Play some relaxing music to set the mood. It helps everyone to get into the creative zone.
Hosting a canvas painting party allows everyone to create their masterpiece. It’s a great way to express yourself and learn new painting techniques. Whether you follow a tutorial or paint from your imagination, the results will be unique and personal. Here’s a simple table to help you plan:
| Item | Quantity | Notes |
|---|---|---|
| Canvases | One per person | Choose different sizes for variety |
| Acrylic Paints | Multiple colors | Basic colors plus any theme-specific colors |
| Brushes | Assorted sizes | Include fine, medium, and large brushes |
| Palettes | One per person | For mixing colors |
Rock Painting Fun
Rock painting is another creative and enjoyable activity. It’s simple and requires minimal supplies. Follow these steps to get started:
- Collect Rocks: Find smooth, flat rocks. You can collect them from your yard, parks, or buy them from garden centers.
- Clean Rocks: Wash the rocks to remove any dirt. Let them dry completely before painting.
- Paint Designs: Use acrylic paints to create your designs. Popular ideas include animals, mandalas, and inspirational words.
- Seal the Paint: Once dry, apply a clear sealant to protect your artwork.
Rock painting is a great way to create small works of art. It’s also a fun and relaxing activity for everyone. You can hide your painted rocks around your neighborhood for others to find. This spreads joy and encourages others to join in the fun. Here are some design ideas to try:
- Animals: Paint cute animals like ladybugs, bees, or cats.
- Nature: Create designs inspired by flowers, trees, or the ocean.
- Words: Write inspiring words or quotes on the rocks.
Rock painting is an easy and creative way to spend time with friends. It’s perfect for those who enjoy a more relaxed and laid-back craft night. Plus, the results are beautiful and make great gifts or decorations.
Unique Jewelry Making
Gather your friends for a delightful craft night and dive into the world of unique jewelry making. Creating handmade jewelry is a fantastic way to bond, showcase creativity, and leave with beautiful pieces to cherish. From beaded bracelets to wire wrapped rings, these DIY crafts promise endless fun with friends.
Beaded Bracelets
Beaded bracelets are a versatile and enjoyable craft project. They allow you to explore various beading techniques and create stunning pieces of art. To start, you’ll need some basic crafting supplies:
- Beads of different colors and sizes
- Elastic string or wire
- Clasps and closures
- Scissors
- Beading needles
Here’s a simple step-by-step guide to making beaded bracelets:
- Choose your beads. Mix and match colors for a vibrant look.
- Cut a piece of elastic string. Measure it to fit your wrist.
- Thread the beads onto the string. Use a beading needle if needed.
- Once all beads are threaded, tie a secure knot at the end.
- Add a clasp if desired. Ensure it’s tightly fastened.
Beaded bracelets are perfect for friendship activities. You can create matching sets or personalized designs for each friend. This craft night project is easy to learn and offers endless creative possibilities.
Wire Wrapped Rings
Wire wrapped rings are a unique and elegant addition to your handmade jewelry collection. This creative project involves shaping wire into intricate designs around a central bead or gemstone. Here’s what you’ll need:
- Jewelry wire (preferably 20-24 gauge)
- Beads or gemstones
- Wire cutters
- Round-nose pliers
- Flat-nose pliers
Follow these steps to make your wire wrapped rings:
- Cut a piece of wire. About 12 inches should be sufficient.
- Place the bead or gemstone in the center of the wire.
- Using round-nose pliers, wrap one end of the wire around the bead.
- Continue wrapping the wire in a circular pattern. Create a secure hold.
- Use flat-nose pliers to tuck in any loose ends. Ensure the ring is comfortable to wear.
Wire wrapping is a fascinating art and crafts technique. It allows for a lot of creativity and personalization. Each ring can be as simple or as complex as you desire. This makes wire wrapped rings an exciting project for a craft night with friends.
Seasonal Crafts
Planning a craft night with friends is always a great idea. But when you add a seasonal twist, it becomes even more fun. Seasonal crafts are perfect for celebrating holidays and changing weather. Plus, they give your home a festive touch. Here are some creative ideas to make your craft night memorable.
Holiday Ornaments
Making holiday ornaments is a joyful and easy craft. You can create unique pieces to hang on your tree or give as gifts. Here are some ideas:
- Salt Dough Ornaments: Mix flour, salt, and water. Shape the dough with cookie cutters. Bake, cool, and paint them.
- Glass Ball Ornaments: Fill clear glass balls with glitter, paint, or small trinkets. Personalize them with names or dates.
- Felt Ornaments: Cut shapes from felt. Sew or glue them together. Add buttons, beads, or embroidery for extra flair.
These crafts are simple and inexpensive. Plus, they bring a personal touch to your holiday decor. Here’s a quick recipe for salt dough ornaments:
| Ingredient | Amount |
|---|---|
| Flour | 2 cups |
| Salt | 1 cup |
| Water | 1 cup |
Mix the ingredients, knead the dough, and roll it out. Use cookie cutters to create shapes. Bake at 250°F for 2 hours. Once cool, paint and decorate.
Seasonal Wreaths
Creating seasonal wreaths is another fantastic idea. They are great for any time of year. You can use different materials to match the season. Here are some ideas:
- Spring Wreaths: Use fresh flowers, greenery, and pastel ribbons. These wreaths add a fresh look to your home.
- Summer Wreaths: Use seashells, starfish, and bright flowers. They bring a beachy vibe to your space.
- Fall Wreaths: Use leaves, pinecones, and burlap. These wreaths bring warmth and color to your door.
- Winter Wreaths: Use evergreen branches, berries, and snowflakes. These wreaths add a festive touch to the season.
Each wreath is unique and reflects the beauty of the season. Here’s a simple guide to making a basic wreath:
- Start with a wire or foam wreath base.
- Attach greenery or flowers with floral wire.
- Add decorative elements like ribbons, ornaments, or seasonal items.
- Secure everything in place with glue or wire.
- Hang your wreath with a hook or ribbon.
Enjoy your beautiful creation all season long.
Upcycling Projects
Hosting a craft night with friends is an excellent way to bond and unleash your creativity. One of the most exciting themes you can explore is upcycling projects. These projects let you transform old items into something new and beautiful. Plus, they are environmentally friendly. Dive into these fun and practical upcycling ideas, and enjoy a productive evening with your friends.
Repurposed Furniture
Repurposing furniture can be a rewarding and practical upcycling project. With a bit of creativity, you can transform old pieces into stunning new additions for your home. Here are some ideas to get you started:
- Repaint and Refinish: A fresh coat of paint can completely change the look of an old table or chair. Choose vibrant colors for a modern twist or go for a shabby chic look with distressed finishes.
- Reupholster: If you have old chairs with worn-out fabric, consider reupholstering them. Pick fabric that complements your decor and get to work with a staple gun.
- Convert Drawers into Shelves: Remove the drawers from an old dresser and mount them on the wall. These can serve as unique and stylish shelves for books, plants, or decorative items.
Here’s a simple guide to transforming an old coffee table:
| Step | Description |
|---|---|
| 1 | Sand the surface to remove old paint or varnish. |
| 2 | Apply a primer to ensure the new paint sticks well. |
| 3 | Paint the table with your chosen color. Apply multiple coats if necessary. |
| 4 | Add a protective sealant to finish. |
Bottle Planters
Bottle planters are an excellent way to reuse plastic or glass bottles while adding greenery to your space. This upcycling project is simple and perfect for a fun craft night.
Here’s a step-by-step guide to creating your own bottle planters:
- Gather old plastic or glass bottles. Clean them thoroughly.
- Cut the bottle in half or cut out a section from the side to create an opening for the plants. Be careful when cutting glass bottles; using a glass cutter is recommended.
- Decorate the bottles. Use paints, markers, or even decoupage with colorful paper or fabric.
- Fill the bottom of the bottle with small stones for drainage.
- Add potting soil on top of the stones. Leave enough room for your plants.
- Plant your chosen herbs, flowers, or succulents in the soil.
- Water the plants lightly and place the bottle planters in a sunny spot.
Here are some decoration ideas for your bottle planters:
- Painted Patterns: Use acrylic paints to add fun patterns and designs on the bottles.
- Rope Wrapping: Wrap the bottles with jute rope for a rustic look. Secure with hot glue.
- Fabric Covers: Use scraps of fabric to cover the bottles. Attach with glue for a cozy feel.
These bottle planters not only look beautiful but also make great gifts. Enjoy creating these eco-friendly pieces with your friends!

Credit: smallchurchministry.com
Interactive Games
Hosting a craft night with friends is a delightful way to bond and unleash your creativity. Interactive games add an extra layer of fun and can make the evening even more memorable. Below are some creative ideas to incorporate interactive games into your craft night.
Craft Trivia
Turn your craft night into a quiz show with Craft Trivia. This engaging game tests your knowledge of all things crafty while encouraging friendly competition. You can prepare a set of questions beforehand or find trivia quizzes online related to creative activities and DIY projects.
Here are some ideas for Craft Trivia questions:
- History of famous art styles
- Names of different types of craft materials
- Famous crafters and their works
- Techniques used in various craft forms
To make it more interactive, consider using a point system and awarding small prizes for correct answers. You can use the following table to keep track of scores:
| Friend’s Name | Points |
|---|---|
| Sarah | 10 |
| John | 8 |
This game not only entertains but also educates, adding value to your craft night ideas.
Diy Bingo
DIY Bingo is a fantastic way to keep everyone engaged while working on their craft projects. Create bingo cards with different crafting tasks or items related to the night’s theme. For example, you can include:
- Use glitter
- Cut paper into a specific shape
- Glue three different materials together
- Draw a specific pattern
Hand out the bingo cards and markers at the beginning of the night. As friends complete each task, they can mark it off on their card. The first person to complete a row or column wins a prize. This game encourages creativity while keeping everyone on their toes.
Here is an example of a DIY Bingo card:
| B | I | N | G | O |
|---|---|---|---|---|
| Use glitter | Cut a shape | Glue three materials | Draw a pattern | Use a button |
| Paint a flower | Use fabric | Draw a star | Use stickers | Create a bow |
DIY Bingo is perfect for social crafting, as it keeps everyone talking and interacting. This game also adds a fun twist to your group craft projects, making your craft night truly unforgettable.

Credit: theeverygirl.com
Conclusion
Craft nights with friends create lasting memories and foster creativity. Try these 12 ideas for an unforgettable evening. Make personalized gifts, explore new techniques, and enjoy laughter together. The bonding experience strengthens friendships and inspires artistic talents. Gather supplies, set a date, and start crafting. Delight in the shared moments and artistic achievements. Happy crafting!